
Like many of you, I’ve been passing the time doing projects I’ve put off for a long time. The video shows what I’ve done. The narrative below reveals the challenges (screw-ups) that befell me doing them.
I get inspired to do most of my “Do It Yourself” projects because I’m cheap. I wanted to update our guest room comforter but couldn’t find anything I liked. I guess that’s not strictly true. I found things I like, but to afford them I would have to sell one, and maybe two, of my vital internal organs.
Being fond of my kidneys and such, and what with extra time on my hands, and since the fabric store is about the only thing open, I decided to make the comforter. Theoretically, it’s pretty easy to do. It’s basically like making a sandwich. You take a top hunk of fabric and a bottom hunk of fabric (the bread), and you put some batting in between (the cheese). Sew them together and wallah, you’ve got a tasty comforter!
Like any recipe the problem comes in the execution. How big a hunk of fabric? How thick should that batting be? Too thick and it’ll be hard to get in my mouth.
Did I go too far with the sandwich analogy? I’m trying to say, in a clever way, that when I sew it’s always a recipe for misery. After much searching I finally found a nice cotton fabric at Joann’s I liked but they only had one yard left. It takes five to six yards to make a comforter with 45” wide fabric. I bought their one yard and ordered more online and, because I lack the most basic measuring skills, I didn’t order enough. When I went online to order more, it was sold out. From a financial standpoint, I was into this fabric too deep to scrap it and look for something else – I didn’t even get it on sale! So I pieced fragments together to make the back of the comforter – it’s the Frankenstein side.
Anyone who’s ever talked to me during a project knows that I engage in myriad mistakes. It’s not from lack of planning, because I’m meticulous with making sketches and figuring out what I need to do. It’s lack of concentration. For instance, if you were making a shirt, would you sew one sleeve on backwards so that the sleeve would be inside out when you put the shirt on? Of course you wouldn’t. This is a mess you’d have the sense to avoid. But I do it all the time. I sewed the wrong side of that comforter to the right side. It’s not an easy thing to do. It’s almost like I have to go out of my way to screw up.
It’s why my friend Laurie says she’s buying stock in seam rippers – those little gadgets that help you undo the mistakes you made so you can start over. She knows that I sew every seam three times and rip it out twice. The floor around my sewing machine looks like someone got a haircut and didn’t sweep it up, but on closer inspection it’s mounds and mounds of ripped-out thread.
In the video you’ll see the cute black-and-white-checked gingham around the edge of the comforter – I had to put that on there, not because it would enhance its beauty, but because I cut the fabric too short and the comforter wouldn’t cover the bed.
Unfortunately, I’m also tenacious. Any other person, after re-doing a project so many times, would toss the unfinished nightmare into a garbage can and go have a tall glass of wine, but not me. Once I got that comforter looking okay (on the front – I’ll never show you the back), I made pillow shams out of the leftover scraps. Then I made the lumpy bolster out of the extra gingham. Never made a bolster before, and I’ve since figured out how to make it un-lumpy, but it would require taking it apart and I’m sick of the whole thing. Sick sick sick. Besides, the lumps give it character, don’t you think?
Then I wanted some nice cotton sheets and bought two different sets that were awful. Not so long ago you could get a decent set of all-cotton sheets on sale at Penney’s for about fifty bucks. For that now you get a sheet set made in India, packaged like a dream, but as soon as you wash them you have a wadded up ball, fresh out of the dryer, with more wrinkles than a Shar Pei puppy, all covered in little goosebump pills, and they cling to your pj’s like Velcro when you try to roll over. There are nice cotton sheets out there, but for some reason (probably a conspiracy) they cost a fortune.
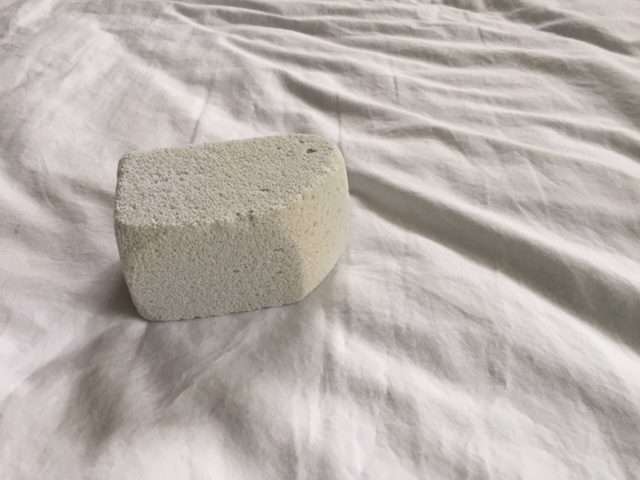

So I made my own. Crazy, yes, but this premium muslim fabric I got from Joann’s was so nice, and on sale! When I washed it, however, it was like grandma’s fried chicken – extra crispy. I asked Google what to do and followed the suggestion to rough up every inch of the sheets with a pumice stone. Not only did I make my own sheets, I made my own brushed cotton. I had to rip out and re-sew that fitted sheet at least ten times because it didn’t fit, but the sheets are very nice – I’ve tested them out many times when my husband’s snoring starts sounding like a roaring jet with a coughing engine.
Oh, and by the way, I found some wonderful cotton sheets online from MagnoliaOrganics.com – they feel a lot like my muslim sheets (after the brushing). They’re only $100 but such nice quality. They won’t be as soft after you wash them, but if you love crisp (but not finger-lickin’ crispy), thick cotton sheets, you won’t find a better deal anywhere for this quality.
The other project was a new tank stand for our 14 year old goldfish. (Thanks to my daughter for bringing a goldfish home as a prize from 6th grade – oh, and thanks to the elementary school for awarding live fish to innocent children to break their hearts when they go belly-up the next day or giving them one that just WON’T die, and for all the years I’ve sucked water out of that tank to keep it clean, and all the broken filters I’ve replaced, and all the disposable carbon cartridges I’ve bought, and my deafness from cranking up the TV to hear it above the constant gurgling of that stupid tank, and for the way that fish shimmies whenever I walk by to entice me to give it more food, which I do sometimes because it’s kind of cute but then it craps more so I have to siphon out the tank and change the water more often.)
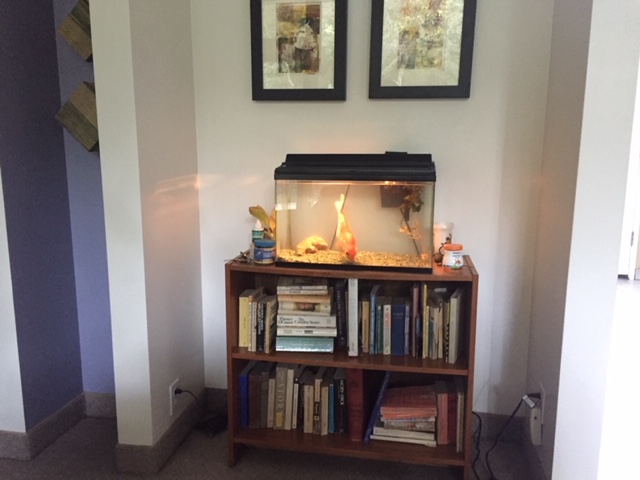
After 14 years the fish was getting too big for his 10 gallon tank – truth be told he was probably too big for it at 10 years but I figured that surely he was about to die so why bother. The existing stand wouldn’t hold the bigger tank, so I needed a new one and couldn’t find one to fit the space and that I liked (and you know what I mean when I say “liked”).
Here’s the summary of that project: Measured the space, bought a bunch of 2 x 6’s, measured the boards, cut the boards. Put oil-based urethane on them and got high on the fumes for days as I worked. Drilled screw holes to assemble the table. Oops, drilled holes on the wrong side. Drilled new holes. Screwed in the screws and put together a few boards and oops, unscrewed them because what I thought was the top was actually the bottom. Wrote “top” and “bottom” on assorted boards.
Started re-assembling and realized I didn’t measure the boards right. Had to take them to Laurie’s husband to shave off 1/8th inch with his table saw. Re-assembled. Repeated all mistakes and added new ones. Started over. Finally got the damned thing together and positioned it in the house (barely fit with only a hair to spare), got the new tank set up, moved the fish which was extremely stressful because he’s a scaredy cat and freaks out all the time about everything – when I drop food in the tank, when I change the water, when I stare at him through the glass to see if he’s got flukes or any of the other infinite diseases goldfish get that I’ve had to buy medicine for over the years, so I knew the move could kill him. That might not have been so bad, all things considered, but after I spent so much time and money, I actually wanted him to live a little while longer.
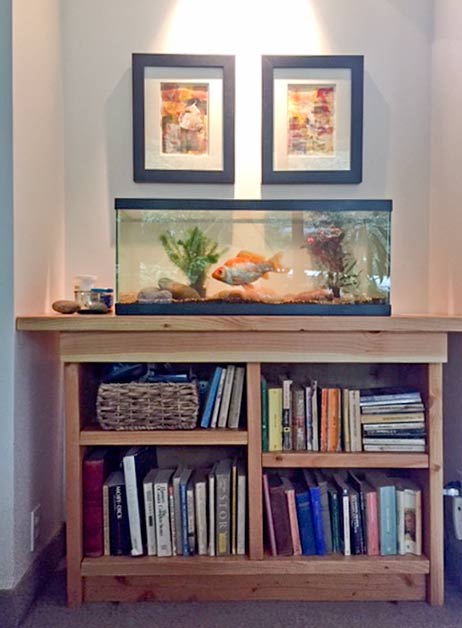
My husband came home from work, looked at the stand, shook his head and said, “It took you two weeks to build that thing?”
It’s ugly, I won’t deny it. It doesn’t match anything else in the house. But everyone’s so impressed I got it done and the fish lived through it that nobody cares, especially not me.
Leave a Reply